Chinese Paper Cutting Tutorial: Tools, Folding Methods, and 7 Easy Steps for Beginners
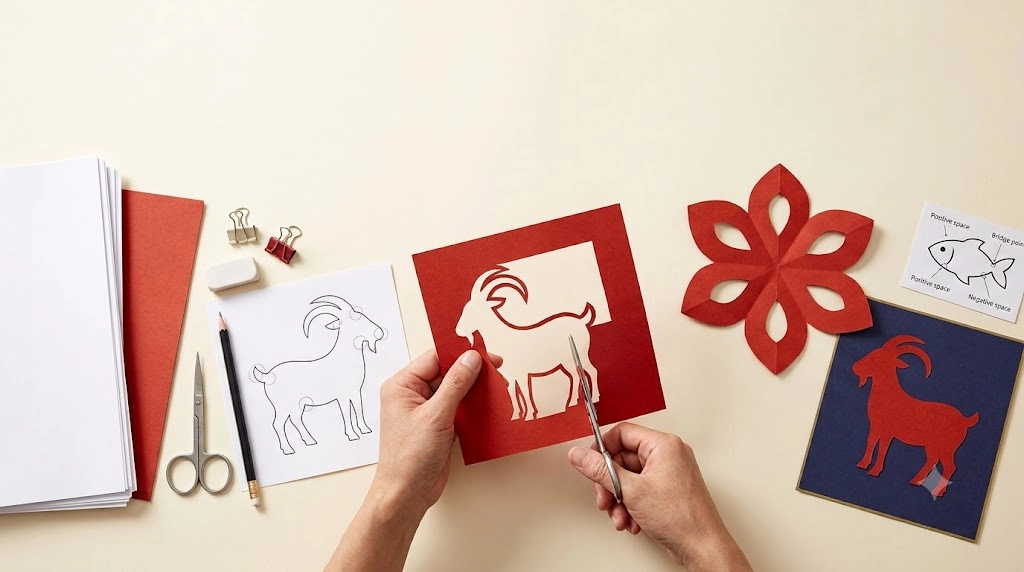
This Chinese paper cutting tutorial begins with three things: a connected design, suitable paper, and a clear cutting order. This guide teaches you how to prepare your tools, understand bridges, follow a seven-step workflow, and finish a simple folded flower project.
The most important rule is structural: every major part of the design must stay connected after cutting. You are deciding which paper stays, which paper is removed, and where narrow bridges hold the whole artwork together.
 Click to enlarge
Your Beginner Course Roadmap
Use this Chinese paper cutting tutorial like a small lesson. Move through the sections in order if this is your first Chinese paper cutting project.
What Do You Need for Chinese Paper Cutting?
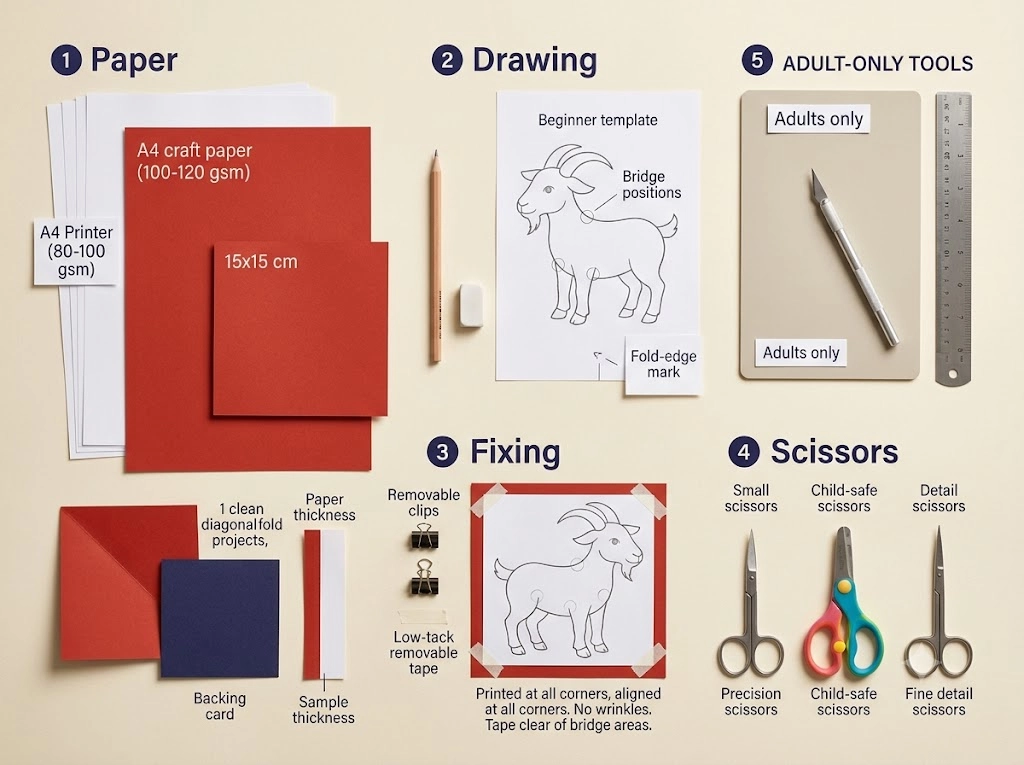
In this Chinese paper cutting tutorial, a beginner project does not require a large craft kit. Most simple designs can be completed with paper, scissors, a pencil, and a printed or hand-drawn pattern.
 Click to enlarge
Minimum kit
- 80–100 gsm printer paper for practice
- Small scissors for basic curves
- A pencil and eraser
- A printed template or hand-drawn pattern
- A clean, flat work surface
Better kit
- 100–120 gsm colored paper for sturdier work
- Detail scissors for small curves
- Removable tape or small clips
- A backing card for display
- A glue stick for mounting finished designs
How to Use Scissors and a Craft Knife Safely
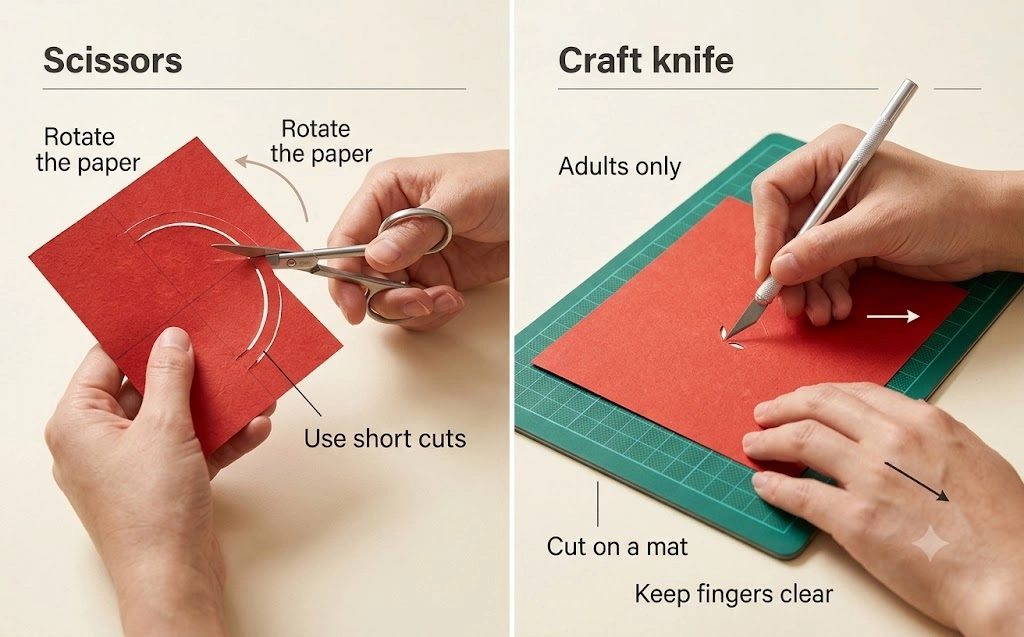
Good structure and controlled cutting matter more than the tool. For most beginners, scissors are enough.
 Click to enlarge
Use scissors for most projects
- Rotate the paper instead of twisting your wrist sharply.
- Use short cuts around curves.
- Stop if the paper becomes difficult to control.
Use a craft knife only when needed
- Adult-only tool.
- Cut only on a mat.
- Best for tiny interior openings.
How Does Chinese Paper Cutting Work?
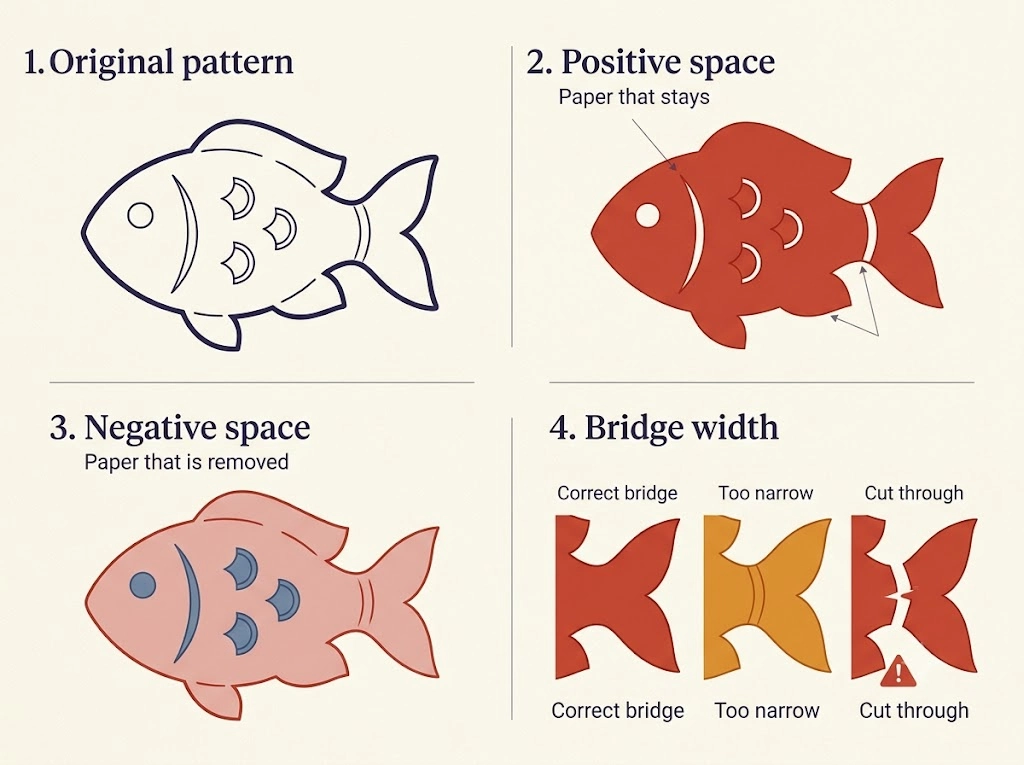
Before cutting, this Chinese paper cutting tutorial focuses on three structural ideas behind every paper cut: positive space, negative space, and bridges.
 Click to enlarge
Positive space
The parts that stay. Body, fins, outlines, petals, and bridges are positive space.
Negative space
The parts you remove. Openings, holes, and background cuts are negative space.
Bridges
Narrow paper links. Bridges stop the design from falling apart after the cut areas are removed.
Traditional context
For cultural background, UNESCO lists UNESCO Chinese paper-cut overview as an intangible cultural heritage practice. This lesson stays practical: it focuses on beginner tools, bridge structure, and a repeatable cutting order.
Which Chinese Paper Cutting Method Should You Start With?
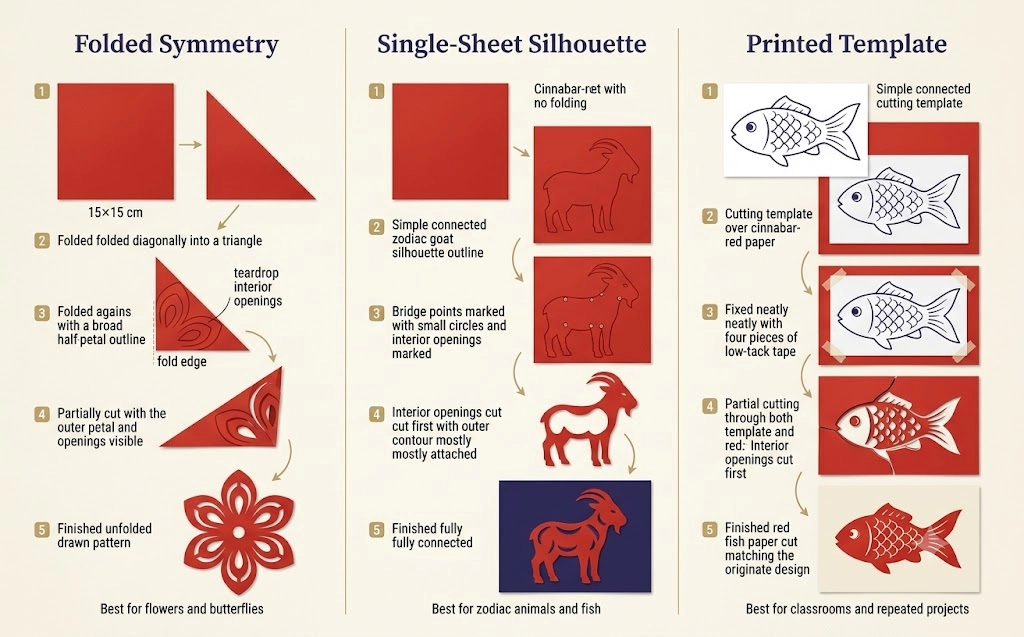
There are three beginner-friendly ways to start. Pick the method based on the result you want, not just the design that looks prettiest.
| Method | Best for | Start here if | Main risk |
|---|---|---|---|
| Folded symmetry | Flowers, butterflies, window flowers | You want the easiest first win. | Cutting through the fold |
| Single-sheet silhouette | Zodiac animals, fish, birds | You want a natural shape. | Weak bridges |
| Printed template | Classrooms and repeated projects | You want consistent results. | Template shifting |
 Click to enlarge
How to Do Chinese Paper Cutting Step by Step
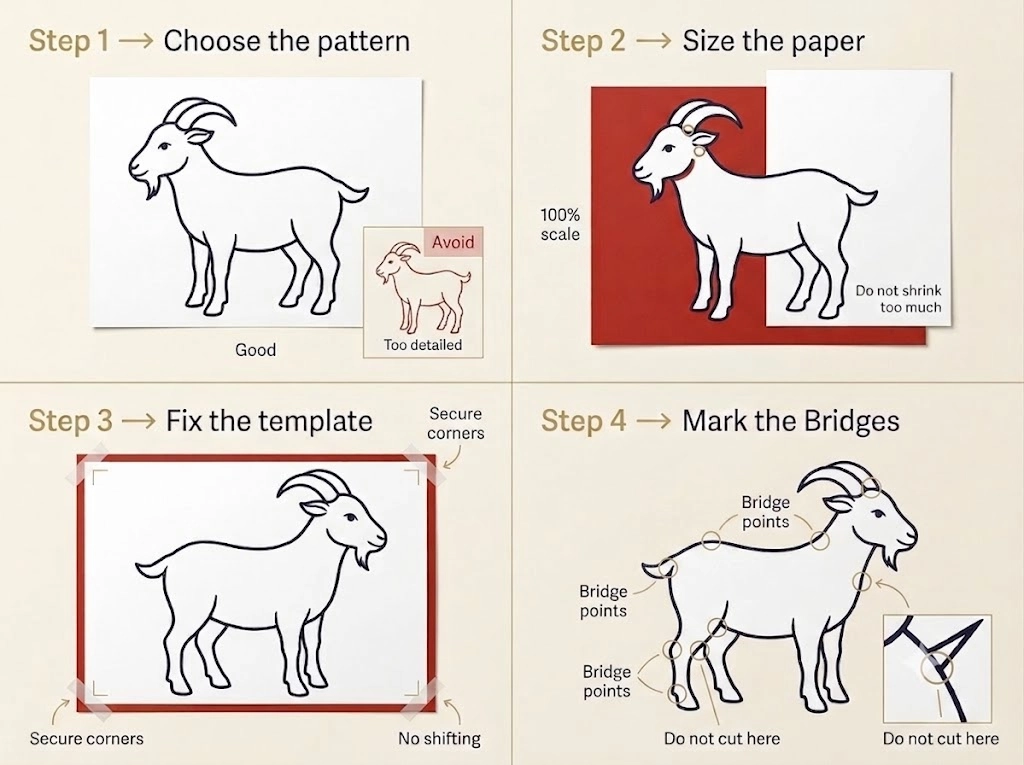
The following seven steps are the core of this Chinese paper cutting tutorial. They can be used for folded patterns, silhouettes, and printed templates. The same logic applies even when the shape changes.
Steps 1–4: prepare before cutting
 Click to enlarge
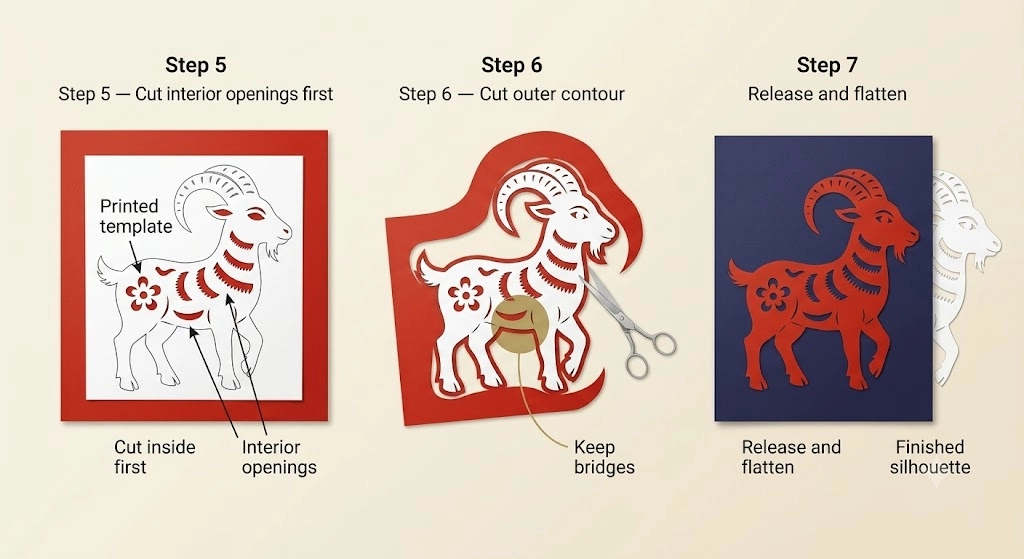
Steps 5–7: cut, release, and flatten
 Click to enlarge
Why cut inside first?
Interior openings are easier to control while the design is still supported by the surrounding paper. Once the outer contour is cut, the design becomes more flexible and easier to tear.
Why keep bridges?
Bridges are the paper links that keep horns, tails, petals, fins, and legs attached. If a bridge is cut through, that section may fall away from the final design.
Six-Petal Folded Flower
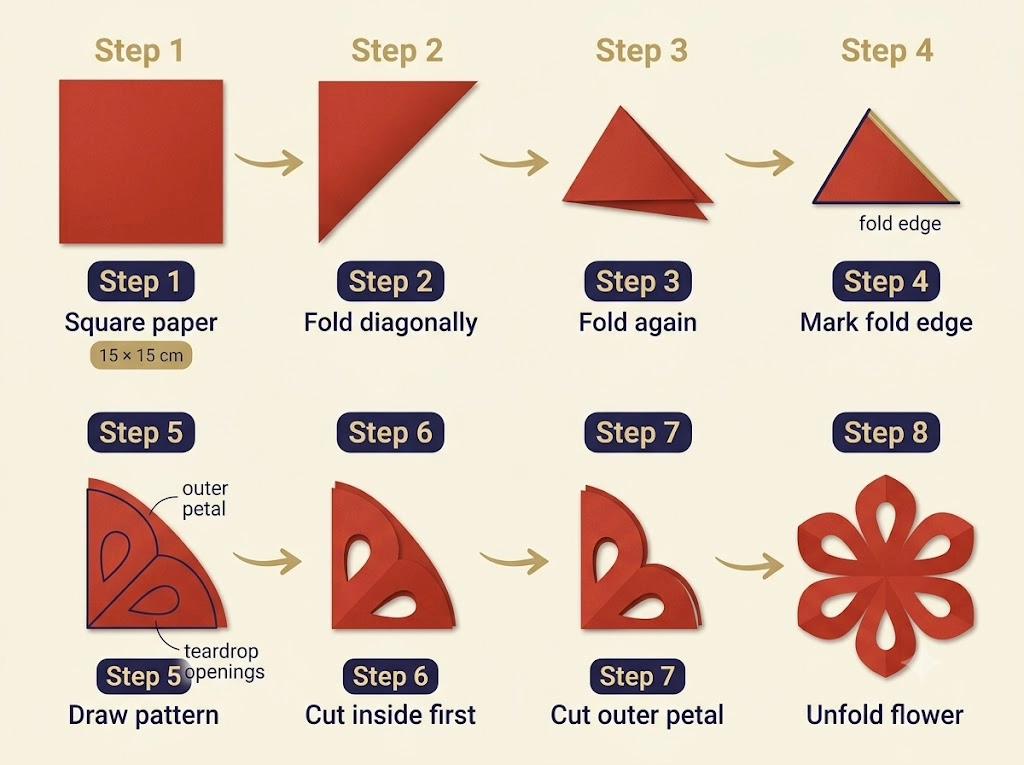
This Chinese paper cutting tutorial uses a six-petal flower to teach folding, symmetry, interior openings, outer-contour cutting, and careful unfolding. It is the best first practice project before trying animal silhouettes.
 Click to enlarge
- Prepare a square. Start with one precise 15 × 15 cm sheet.
- Fold diagonally. Bring one corner to the opposite corner.
- Fold again. Create a smaller triangle and align the edges.
- Identify the fold edge. This edge must remain connected.
- Draw the half-petal shape. Keep it broad, rounded, and simple.
- Add two teardrop openings. Keep them away from the edge and fold.
- Cut openings first. Then cut the outer petal contour.
- Unfold slowly. Support the center and petal connections.
Your finished flower should have:
- Exactly six petals
- A solid connected center
- No broken bridges
- Matching repeated openings
What Went Wrong With Your Paper Cut?
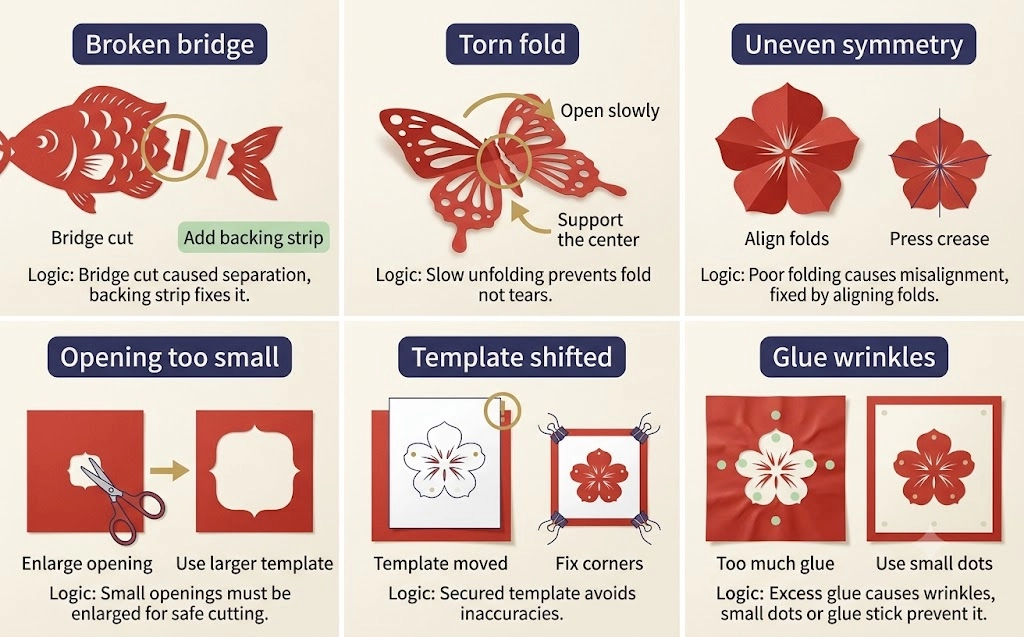
This Chinese paper cutting tutorial also helps you diagnose six common beginner mistakes: a cut bridge, a torn fold, uneven symmetry, openings that are too small, a shifting template, or too much glue.
 Click to enlarge
Broken bridge
Cause: a connection point was cut through.
Fix: reinforce the back with a narrow paper strip.
Torn fold
Cause: the paper was opened too quickly or the fold was too narrow.
Fix: unfold slowly and support the center.
Uneven symmetry
Cause: folds were not aligned before cutting.
Fix: press creases firmly before drawing the pattern.
Opening too small
Cause: the design was reduced too far.
Fix: enlarge the opening or print the template larger.
Template shifted
Cause: the template was not secured at the corners.
Fix: use removable tape or clips away from the cutting path.
Glue wrinkles
Cause: too much liquid glue soaked the paper.
Fix: use small glue dots or a light glue stick on broad areas.
Is Chinese Paper Cutting Safe for Children?
Chinese paper cutting can work well for children when the project is matched to age, tool control, and paper thickness.
Ages 6–8
- Simple folded flowers
- Broad geometric windows
- Rounded scissors
Ages 8–11
- Folded flowers
- Butterflies
- Simple fish
Ages 12+
- Simple zodiac silhouettes
- Printed templates
- Layered paper projects
Classroom teaching tips
- Demonstrate the fold before students begin.
- Show which areas stay and which areas are removed.
- Point out every bridge.
- Complete one sample in front of the group.
- Provide a simpler backup template.
Chinese Paper Cutting Tutorial FAQ
What paper is best for a Chinese paper cutting tutorial?
For a Chinese paper cutting tutorial, start with 80–100 gsm printer paper for practice. Once the cutting order feels comfortable, move to 100–120 gsm colored paper for a sturdier final project.
Can I use normal printer paper?
Yes. Printer paper is useful for practice because it folds easily and is inexpensive. It may feel less decorative than red craft paper, but it is beginner-friendly.
Should I use scissors or a craft knife?
Most beginners should start with small scissors. A craft knife is useful for tiny interior openings, but it should be used only by adults on a cutting mat.
Why does my paper cut fall apart?
The most common reason is that a bridge was cut through. Any isolated area needs a paper connection to remain part of the final design.
Why should I cut inside openings before the outer contour?
The surrounding paper supports the design while you cut the interior areas. If the outer contour is cut first, the design becomes weaker and harder to control.
What is the easiest Chinese paper cutting project?
A folded six-petal flower is usually the easiest first project because the symmetry is created by folding rather than drawing every petal separately.
Can children do Chinese paper cutting?
Yes, with age-appropriate scissors, simple folded projects, and adult supervision. Craft knives should stay adult-only.
How do I make a difficult template easier?
Enlarge the template, remove tiny details, thicken bridges, simplify small openings, and keep the outer contour broad and clear.
Do I need traditional Chinese patterns to start?
No. You can begin with simple flowers, fish, or connected silhouettes. Traditional motifs can be added after you understand structure and cutting order.
How long does a beginner paper cutting project take?
A simple folded flower may take 15–25 minutes. A printed animal template may take 30–40 minutes, depending on the number of interior openings.
Continue Your Paper Cutting Practice
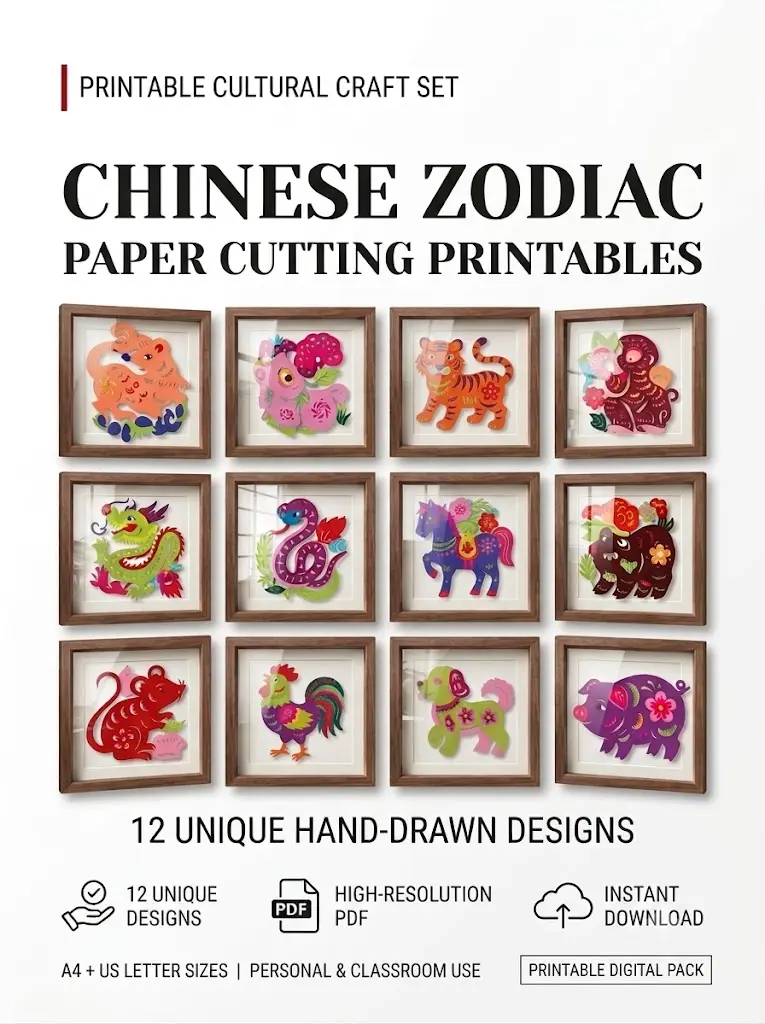
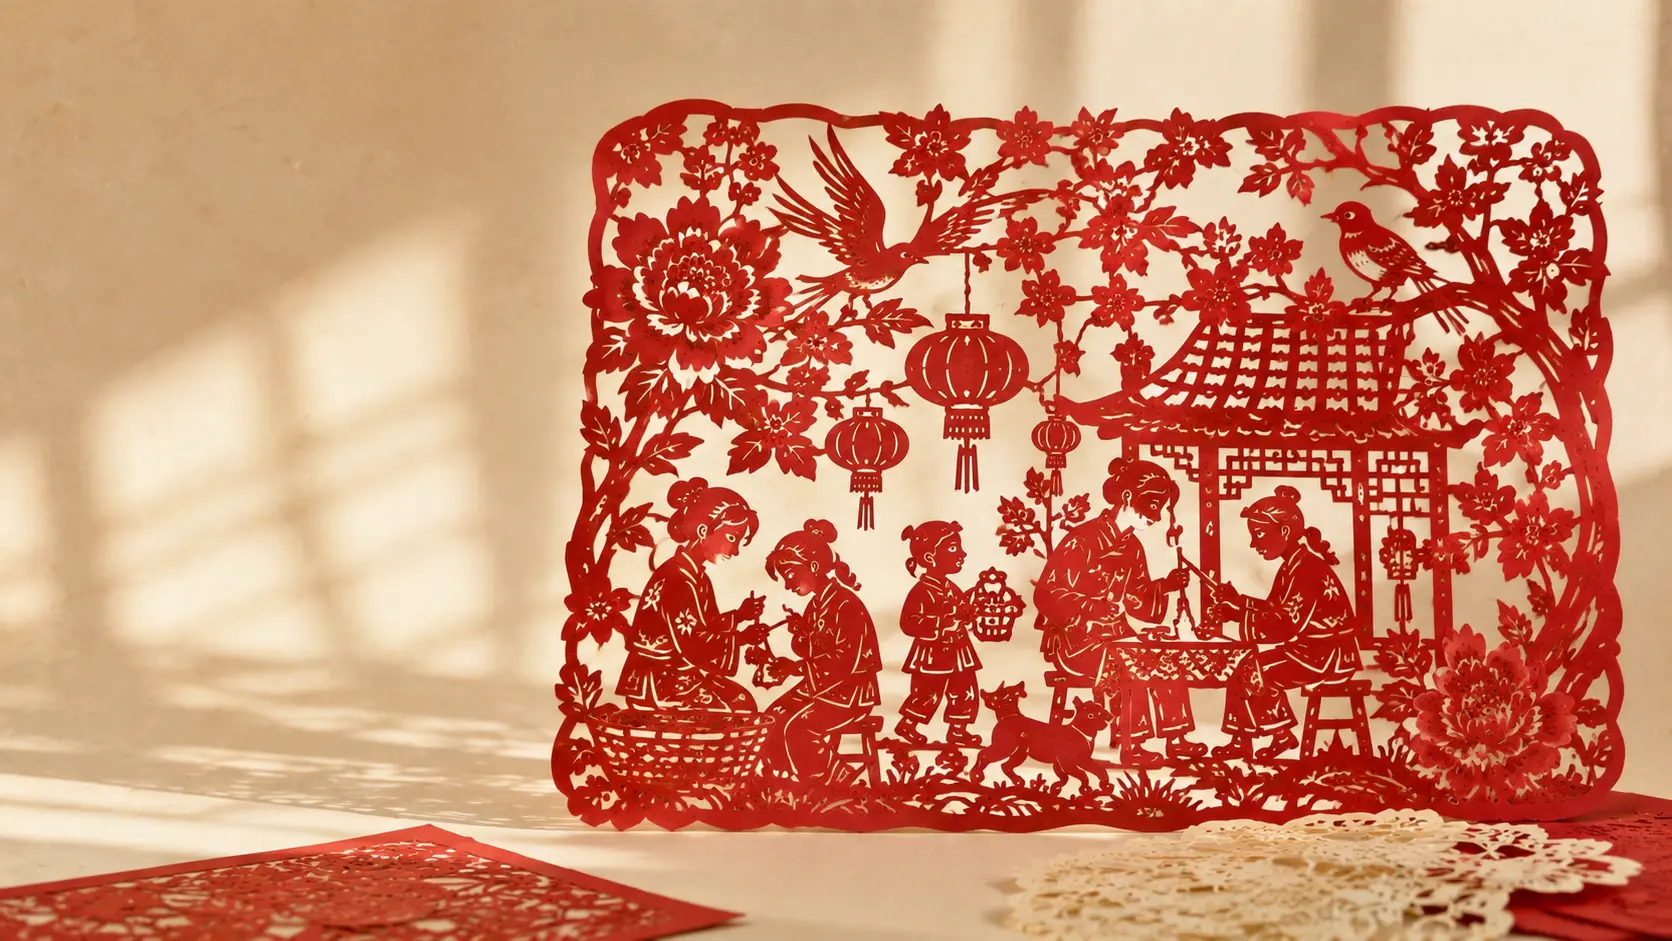
Choose your next step after this Chinese paper cutting tutorial: browse pattern types, test a free zodiac template, plan a card or gift tag, or learn the cultural background behind the craft.


Before You Cut Your Next Pattern
Use this checklist before starting another Chinese paper cutting project.
This Chinese paper cutting tutorial is designed to work as a complete beginner lesson: prepare your tools, understand bridges, cut in the correct order, and finish with a stable practice project.
Structure check
- Every major section has a bridge.
- Interior openings are large enough to cut safely.
- The outer contour is broad enough for beginners.
- The fold edge is not cut through.
Workflow check
- Choose a simple connected design.
- Secure the template before cutting.
- Cut interior openings first.
- Cut the outer contour last and unfold slowly.